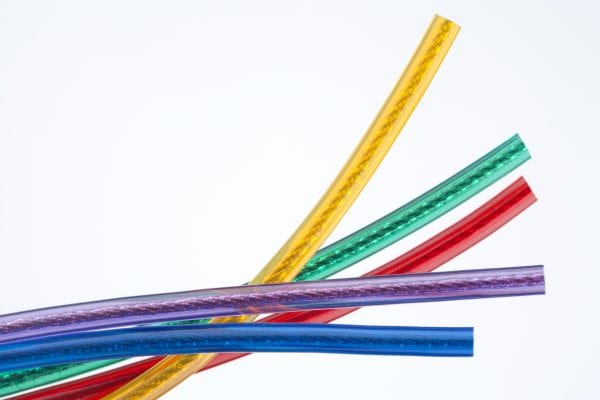
Part 1: Solderable Litz Wire
Solderable Litz wire is constructed from magnet wire that has a solderable enamel.
Soldering
A number of factors affect the quality of the soldered termination of a Litz conductor manufactured with solderable wire. The following provides general guidelines for these factors.
Choice of Solder Pot
Quantity of solder should be large enough so that solder temperature is not lowered significantly during sample immersion. For example a solder pot with a five lb. capacity would be sufficient for Litz up to an approximate diameter of .250”, being immersed 1 inch. For larger conductors or for higher production capabilities a larger solder pot is recommended. Note that the solder pot and solder type in some cases must be compatible. Please consult your solder and solder pot supplier for recommendations.
Choice of Solder
At the high temperatures used to remove the enamel from each insulated strand of the conductor, replacement of copper by the tin element of the solder can be a factor. Traditionally a 50/50 tin lead solder or 60/40 tin lead solder was recommended as a general rule. There are also many green formulations of solder available SN/AG SN/AG/CU and SN/CU. Slight modifications may be required in soldering profile technique and tooling, and possibly a solder pot compatible with the solder type, when changing from tin/lead solder.
Heat Sink
A heat sink is used to prevent soldering heat from migrating up the cable and affecting the Litz wire strength and flexibility. The heat sink is sized to the wire and clamped onto the wire just above the portion to be immersed. Pliers with brass jaws or brass bars attached to the jaws work well and also provide a means of holding the sample.
Solder Temperature and Immersion Time
Solder temperature varies with the type of magnet wire being soldered, the size of the overall construction, and the size of the individual wires. In general, finer single end sizes work well with low to medium temperatures and short immersion times. As the single end size and the construction diameter grows, the temperature and immersion time increase. Typical immersion times are from 2 to 60 seconds maximum and must be determined for each individual construction. See below for recommended starting temperatures for standard materials and sizes.
Starting points
Polyurethane based magnet wires:
- Small constructions less than .250” in diameter or equivalent diameter – 415°C immersed for approximately 10 seconds.
- Constructions over .250” in diameter or equivalent diameter – 430°C immersed for approximately 20 seconds.
Polyester based magnet wires:
- Small constructions less than .250” in diameter or equivalent diameter – 470°C immersed for approximately 15 seconds.
- Constructions over .250” in diameter or equivalent diameter – 470°C immersed for approximately 25 seconds.
Flux
The use of flux to ease the tinning process may be beneficial for the following cases:
- Higher temperature magnet wire (typically polyester based materials)
- Larger constructions approximately .250” diameter and larger
- Increased soldering cycle times
- Highly compacted constructions
In general the use of flux is not required for Polyurethane based materials.
High temperature flux formulated for soldering magnet wire is available. Traditional Type R non-activated flux, or type RA fully-activated flux may also be used. The end of the cable should be immersed in the liquid flux no more than the length of cable to be tinned or as experience dictates.
Cleaning
Immediately upon removal from solder pot, wipe tinned length of Litz cable with a clean cloth. Excess flux may also need to be removed. Consult with solder and flux supplier for acceptable methods.
Verification of Solder Joint
Inspection of a cross cut of the soldered end can be done at 100x magnification to ensure a good solder termination. At this magnification the film layer is visible. With a properly soldered joint the strands will be visible with solder intimately surrounding them. With a joint that is not yet soldered well, the film will still be a visible insulator and the solder temperature or immersion time will need to be increased.
Safety
Make sure that adequate protection and safety measures are taken. Wear safety gloves, eye and face protection. Adequate ventilation or breathing protection should be used to avoid breathing of fumes. Soldering should be done under a vented fume hood.
Part 2: Non-Solderable Litz Wire
Non-solderable classes of magnet wire must first be stripped of the enamel. The constructions can then be soldered or mechanically terminated.
SN – Fusing (also works for solderable magnet wires)
This process uses a combination of heat and pressure to replace the enamel with tin/solder. The terminals are also attached in the same process. For more information contact: Joyal- A Division of Alliance Winding Equipment, Inc. or Strunk Connect Automated Solutions, Inc.
Mechanical Method
Physically abrade the enamel material off the magnet wire strands. Works best for larger single end sizes. This can be done manually with sand paper or automatically with nylon or steel brushes depending on AWG size and number of ends. For more information contact: The Eraser Company.
Chemical Method
This is a chemical magnet wire insulation stripper available in both a jell and liquid formula. The ends of the Litz constructions are dipped into the chemical solvent until the enamel is dissolved. Ends are then rinsed and wiped clean. Can be used on most sizes and insulation films. For more information contact: Ambion Corporation.
Oxidizing Flame Method
A brazing method that has a by-product of only water vapor. Flame is used to completely remove enamel and leaves a bright finish. For more information contact: Oweld.
Salts Method
Fused Salts are melted in a pot similar to a solder pot. The ends of the Litz constructions are dipped into the melted salts until the enamel is dissolved. Ends are then rinsed and wiped clean. Can be used on most sizes and insulation films. For more information contact: The Eraser Company.
Crimp Terminals
For use with a limited number of strands of magnet wire (1 to 4 ends). These are special connectors with teeth that punch through the enamel when applied. For more information contact: Molex Electronic Solutions or TE Connectivity- AMP Division.
Torch
A Torch is sometimes used on larger single end sizes to burn away the enamel.
Part 3: Applying Terminals to Litz Wire
Tin the Ends
- Tin the ends of the Litz wire following the guidelines above
- Wipe the tinned area with a rag
- Visually inspect the end for any un-tinned wires. Re-tin if necessary
Crimping the Terminals
- Follow the manufacturer’s recommendations for the crimping process
Back Fill the Terminals
- A hanger to hold the terminated Litz wire is recommended
- Use a large handheld soldering iron (250 Watt) and reheat the terminal area by touching the soldering iron
- Roll solder to the end of the Litz (NOTE: should be done in a vented area)
- Fill the terminal with solder until the face of the terminal is filled and solder is flowing out the rear of the terminal
Cleaning
- Use an acid brush and isopropyl Alcohol to clean any residual flux dirt or other contaminants from the terminations


